


Metal Detecting Tips for Beginners: Start Finding Treasure
Table of Contents
- Why Start Metal Detecting? A Beginner's Path to Treasure
- How to Read Metal Detector Signals: Target ID and Audio Cues
- Mastering the Coil Sweep and Search Patterns
- Pinpointing and Digging Techniques for Clean Recovery
- Choosing the Best Entry Level Metal Detector
- Essential Gear Beyond the Detector
- The Metal Detecting Code of Ethics and Legal Rules
- Your First Hunt: Where to Go and What to Expect
- Frequently Asked Questions
Last Updated: September 9, 2026
Why Start Metal Detecting? A Beginner's Path to Treasure
The best metal detecting tips for beginners start with realistic expectations: you will dig trash before you find treasure. Metal detecting uses an electromagnetic field to locate buried metallic objects, from coins and jewelry to relics and historical artifacts. At Treasure Coast Detectors, we have outfitted thousands of first-time hobbyists, and the ones who stick with it treat the learning curve as part of the fun. If you have questions before you buy or after you start swinging, our support before and after purchase is there to help you through the early learning stages.
The fastest way to improve is to apply metal detecting tips that treat your detector as a tool with settings, not a magic wand. Modern entry-level machines handle the heavy lifting through preset modes, but your success depends on how well you interpret what the machine tells you.
How to Read Metal Detector Signals: Target ID and Audio Cues
Target ID is the number your detector displays when it senses metal, typically ranging from 0 to 99, representing the likely conductivity of the object. Higher numbers usually indicate non-ferrous metals like copper, silver, and gold, while lower numbers often point to ferrous items such as iron nails and bottle caps.
Your machine also produces distinct audio responses: a low tone for iron, a mid tone for foil and pull tabs, and a high tone for coins and jewelry. Learning these tones by ear is faster than staring at the screen.
Discrimination filters out unwanted targets before you dig. Set it too high and you will miss gold jewelry, which often reads in the same range as foil. Start with a moderate setting and dig most repeatable signals until you learn your machine's language.
Mastering the Coil Sweep and Search Patterns
A proper coil sweep is slow, low, and overlapping. Keep the coil parallel to the ground, one to two inches above the surface, and sweep in a straight line from side to side, overlapping each pass by about fifty percent. Moving too fast is the most common beginner error, costing you depth.
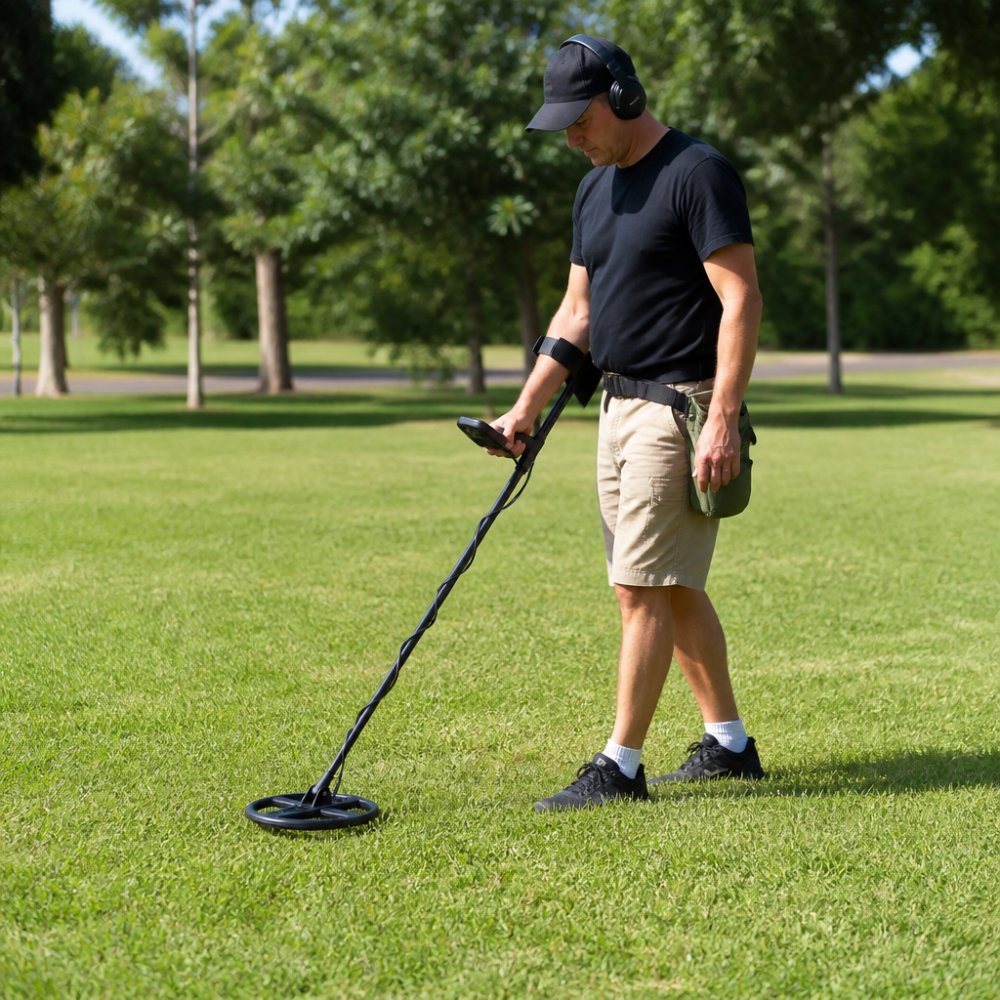
A grid search is the most reliable pattern for covering an area completely. Mark a starting point, walk straight lines in one direction, then turn and walk parallel lines back across the same ground. For larger open fields, a spiral pattern starting from the center works well.
Keep your coil steady and avoid lifting it at the end of each sweep. Many beginners raise the coil like a golf swing, breaking the detection field and missing targets at the edges.
Pinpointing and Digging Techniques for Clean Recovery
Pinpointing locates the exact position of a target before you dig. Most detectors have a pinpoint mode that narrows the signal. If yours does not, use the X method: sweep left to right to find the center, then top to bottom to find the center again. Where the two lines cross is your target.
Once you have located the target, cut a three-sided plug rather than digging a random hole. A plug cut involves slicing a U-shape or three-sided flap into the turf with a digging knife, folding it back, and removing the dirt beneath.
A pinpointer is the single most valuable accessory after the detector itself. It locates the target within the plug or hole, cutting recovery time dramatically.
Choosing the Best Entry Level Metal Detector
The best entry level metal detector balances ease of use, waterproof capability, and room to grow. You do not need a $1,000 machine to start finding coins and relics, but you do need reliable target ID and adjustable discrimination.
Understand the three core specifications that separate a capable starter machine from a toy:
Operating Frequency. Single-frequency detectors transmit at one fixed frequency, usually between 5 kHz and 15 kHz. Lower frequencies (5-8 kHz) excel at coins and silver relics but struggle with small gold jewelry. Higher frequencies (15 kHz or more) are more sensitive to small targets and gold but produce more noise in mineralized soil. Multi-frequency detectors, like the Minelab X-TERRA PRO, switch frequencies automatically or let you select them manually.

Ground Balance. This setting cancels out natural soil mineralization, which otherwise causes false signals and reduces depth. Fixed ground balance is common on budget units and works fine on neutral soils, but for iron-rich dirt or wet beach sand, auto or manual ground balance is essential. The Nokta Makro Simplex Ultra offers automatic ground balance that recalibrates continuously as you sweep.
Waterproof Rating. A fully waterproof detector lets you hunt in rain, shallow water, and wet grass without worry. A water-resistant detector will fail if submerged. The Minelab X-TERRA PRO and Nokta Makro Simplex Ultra are both fully submersible.
Now, the three models that consistently outperform others in the entry-level class:
The Minelab X-TERRA PRO at $295 is the most versatile starter machine. Its PRO-SWITCH technology lets you manually select between 5 kHz, 10 kHz, and 15 kHz frequencies, so you can optimize for coin shooting one day and small gold prospecting the next. It is fully waterproof, weighs 2.2 pounds, and includes a backlit display and vibration mode. The trade-off is that its preset modes are less granular than some competitors.
The Nokta Makro Simplex Ultra at $299 is the depth champion in this class. It uses a 12 kHz single frequency with automatic ground balance that handles highly mineralized soil better than most machines at twice the price. It is fully waterproof, has a built-in flashlight, and includes wireless headphones. The downside is that single-frequency operation limits optimization for very low or very high conductivity targets.

The Nokta Makro Score 2 at $349 is the lightest option at 1.25 kg, ideal for long beach sessions or hunters with arm fatigue. It is waterproof to 5 meters and uses a dual-frequency system that balances depth and target separation. The trade-off is that it lacks the manual frequency selection of the X-TERRA PRO and the extreme depth of the Simplex Ultra.

| Detector | Price | Waterproof | Frequency | Best For | Key Trade-off |
|---|---|---|---|---|---|
| Minelab X-TERRA PRO | $295 | Fully | Multi (5/10/15 kHz) | All-around versatility | Requires manual learning |
| Nokta Makro Simplex Ultra | $299 | Fully | Single (12 kHz) | Depth and mineralized soil | No frequency options |
| Nokta Makro Score 2 | $349 | 5 meters | Dual | Lightweight beach hunting | Less depth than Simplex |
A common beginner mistake is choosing a detector based on price alone. A $150 machine with fixed ground balance and no target ID will frustrate you within a month. The $295-$349 range is the sweet spot for reliable target ID, adjustable discrimination, and waterproofing.
Essential Gear Beyond the Detector
Your detector is only half the kit. A digging tool with a serrated edge is essential for cutting through roots and compacted soil, and a sturdy finds pouch keeps your targets organized.
The Minelab Pinpointer Pro Find 35 at $99 uses DIF technology to eliminate interference with your operating detector. The XP MI-4 Pinpointer at $139 is fully waterproof and standalone, built for rugged conditions and fast target recovery.
A good pair of headphones with a standard jack keeps audio cues clear and saves battery life. Gloves protect your hands from broken glass and sharp metal, and a small brush helps reveal targets in loose soil.
The Metal Detecting Code of Ethics and Legal Rules
The metal detecting code of ethics is simple: leave every site as you found it, fill your holes, and pack out the trash you dig. Responsible detectorists follow a "Leave No Trace" approach, meaning the only evidence of your hunt should be the finds in your pouch.
Legal requirements vary by location, and you are responsible for knowing the rules where you hunt. Federal and state parks generally prohibit removing artifacts, and many require permits for any metal detecting activity. The National Park Service guidance on metal detecting clearly states that detecting and artifact removal are prohibited in national parks without a permit. Always check local ordinances before you start, and secure written permission before hunting private property.
Historical research is your best tool for finding legal hunting grounds. Old maps, property records, and local historical societies can point you to sites where public access is allowed. Public beaches, city parks, and school grounds (outside school hours) are common legal options, but confirm each location's specific rules.
Your First Hunt: Where to Go and What to Expect
Plan your first hunt at a location with high foot traffic and low regulation: a public beach, a city park, or a schoolyard during off hours. These areas accumulate dropped coins and jewelry and are typically open to detecting without special permits. Arrive early and set expectations for a learning session rather than a treasure haul.
A test patch is a small area where you bury a few known targets, such as a coin, a nail, and a pull tab, at different depths, then practice sweeping over them to learn your detector's signals. This ten-minute exercise teaches you how to read metal detector signals more effectively than any manual.
Expect to dig trash. On an average first hunt, you will recover bottle caps, foil, and pull tabs for every coin you find. This is normal and necessary, because trash signals teach you what to ignore.
Troubleshooting Interference Before You Give Up
One of the most common reasons beginners abandon the hobby is thinking their machine is broken when it is actually suffering from electromagnetic interference (EMI) or ground mineralization.
EMI comes from man-made sources: overhead power lines, underground electrical cables, Wi-Fi routers, cell towers, and even nearby metal detectors. Symptoms include erratic chatter, false signals that do not repeat, and target IDs that jump wildly. To diagnose EMI, hold your detector still in the air with the coil pointed away from the ground. If it continues to chatter, you are picking up electromagnetic noise. Solutions include:
- Lower your sensitivity by 20-30% until the chatter stops.
- Switch to a different frequency if your machine allows it (the Minelab X-TERRA PRO's manual frequency selection is ideal here).
- Move 50-100 feet away from power lines or other detectorists.
- Turn off your cell phone or keep it in a pocket away from the control box.
Ground mineralization is a natural condition where iron oxides and other conductive minerals in the soil create a signal that confuses the detector. This is common in the southeastern United States, where red clay is heavily mineralized. Symptoms include a constant low hum that changes as you sweep, depth loss, and false signals. To manage mineralization:
- Run your detector's auto-ground-balance feature before you start hunting. Most entry-level machines do this by holding the coil in the air, then pressing and holding the ground balance button while pumping the coil up and down over the soil.
- Lower your sensitivity. A depth loss of 10-15% is acceptable if it means stable operation.
- Use a smaller coil if your detector supports one. A 5-inch round coil reduces the surface area exposed to mineralized ground, improving stability.
A quick field test to distinguish EMI from mineralization: place your detector on the ground with the coil flat against the soil and walk 20 feet away. If it continues to chatter, it is EMI. If it goes quiet, the noise was caused by ground minerals.
What to Do When You Find Something
Your first instinct will be to dig immediately, but a few seconds of preparation prevents damage to both the target and the site. Re-sweep the area from two perpendicular directions to confirm the signal is repeatable, use your pinpointer to narrow the location, then cut a three-sided plug and set it on a cloth or tarp.
When you recover the target, do not scrub it with water or rub it with your fingers. Coins and artifacts often have a patina or corrosion layer that holds historical value, and aggressive cleaning destroys it. Place the find in a small plastic bag or pill bottle without cleaning it.
Reading Your First Hunt Results
After your first session, lay out your finds and categorize them: coins, jewelry, relics, and trash. Note the target ID numbers and tones that produced each category. Most beginners find that 80% of their trash comes from a narrow target ID range, such as 20-35 on a 0-99 scale.
Metal detecting is a patient hobby with steady rewards for those who learn the fundamentals. The beginners who succeed practice their sweep, learn their signals, and respect the land they hunt on. Start with a quality entry-level detector like the Minelab X-TERRA PRO or Nokta Makro Simplex Ultra. And when you are ready to upgrade your gear or need advice on your next machine, our top tier google store carries everything you need to keep growing in the hobby.
Frequently Asked Questions
What are the do's and don'ts when metal detecting?
Do research local laws and obtain permission before hunting on private or public land. Do fill every hole you dig and pack out all trash you find. Don't hunt on private property without explicit owner approval. Don't ignore historical sites or disturb them; if you find an artifact that seems historically significant, report it to local authorities. Following the metal detecting code of ethics keeps the hobby welcome and protects sites for everyone.
How do I learn to read my metal detector signals?
Start by building a test patch. Bury a coin, a nail, and a piece of aluminum foil at set depths in your backyard. Sweep over each item and listen carefully to the audio tone while watching the target ID number on your display. Practice for a few hours until you can predict what is buried before you dig. This trains your ear to recognize the difference between a high, clear coin signal and the lower, often broken tones of trash.
What equipment do I need besides the detector?
A pinpointer is the most valuable accessory you can own; it cuts recovery time dramatically by locating the target within the hole. You also need a sturdy digging tool, a finds pouch for your targets, and a set of headphones to hear faint signals clearly. For beginners, a quality pinpointer like the Minelab Pinpointer Pro Find 35 is a worthwhile investment that will save you frustration on every hunt.
What is the most common thing to find with a metal detector?
Pull tabs from beverage cans are by far the most common find for beginners. Aluminum foil, bottle caps, and rusted nails follow closely behind. These trash signals are a normal part of the learning curve. As you practice reading your metal detector signals, you will learn to identify and skip many of these unwanted targets. The key is to dig everything at first to learn what your machine is telling you.
What time is best to metal detect on a beach?
Early morning, especially after a storm or a busy weekend, is often the most productive time to hunt a beach. Storms churn up the sand and can deposit heavier items like coins and jewelry closer to the surface. Early mornings also mean fewer people, less interference, and cooler temperatures. Low tide exposes more hunting ground, so check a local tide chart before you head out for the best results.
Do pennies go off in metal detectors?
Yes, pennies are excellent targets for metal detectors. Modern zinc pennies produce a strong, high-toned signal, similar to other copper coins. Older copper pennies (pre-1982) give an even clearer and higher target ID number. For beginners practicing coin shooting, pennies are a great way to learn your machine's audio cues because they are plentiful and produce consistent signals that are easy to identify.
Getting started with metal detecting does not require a huge investment or years of study, but it does require the right guidance and gear. At Treasure Coast Detectors, we pair every beginner with a detector matched to their hunting style, backed by support before and after your purchase. Get started with Treasure Coast Detectors and find the reliable, beginner-friendly equipment that makes your first real treasure a question of when, not if.
Leave a comment