

How Long to Find Relics Metal Detecting? Real Timelines
Table of Contents
- The Honest Answer: How Long Until Your First Relic
- 5 Factors That Control How Long It Takes to Find Relics Metal Detecting
- How to Research Sites for Metal Detecting
- Choosing the Best Entry Level Metal Detector for Relics
- Trash vs. Treasure: Cutting Down Your Dig Time
- Legal Requirements for Metal Detecting You Must Know
- Speeding Up the Process: Tools and Techniques
- Conclusion: Field Time Is Everything
- Frequently Asked Questions
Last Updated: September 6, 2026
The Honest Answer: How Long Until Your First Relic
Most new detectorists expect a Civil War button or colonial coin within their first few weekends. The reality: for most hobbyists, finding a genuine relic takes 10 to 40 hours of dedicated field time. The biggest variable is not luck but preparation.
Relic hunting is the pursuit of historical artifacts buried in the ground, and how long it takes depends almost entirely on where you swing your coil and how well you understand your machine. A common mistake is heading to the nearest park, likely hunted for decades. Consistent finders spend more time researching than digging.
Below, we'll show you how to compress that timeline.
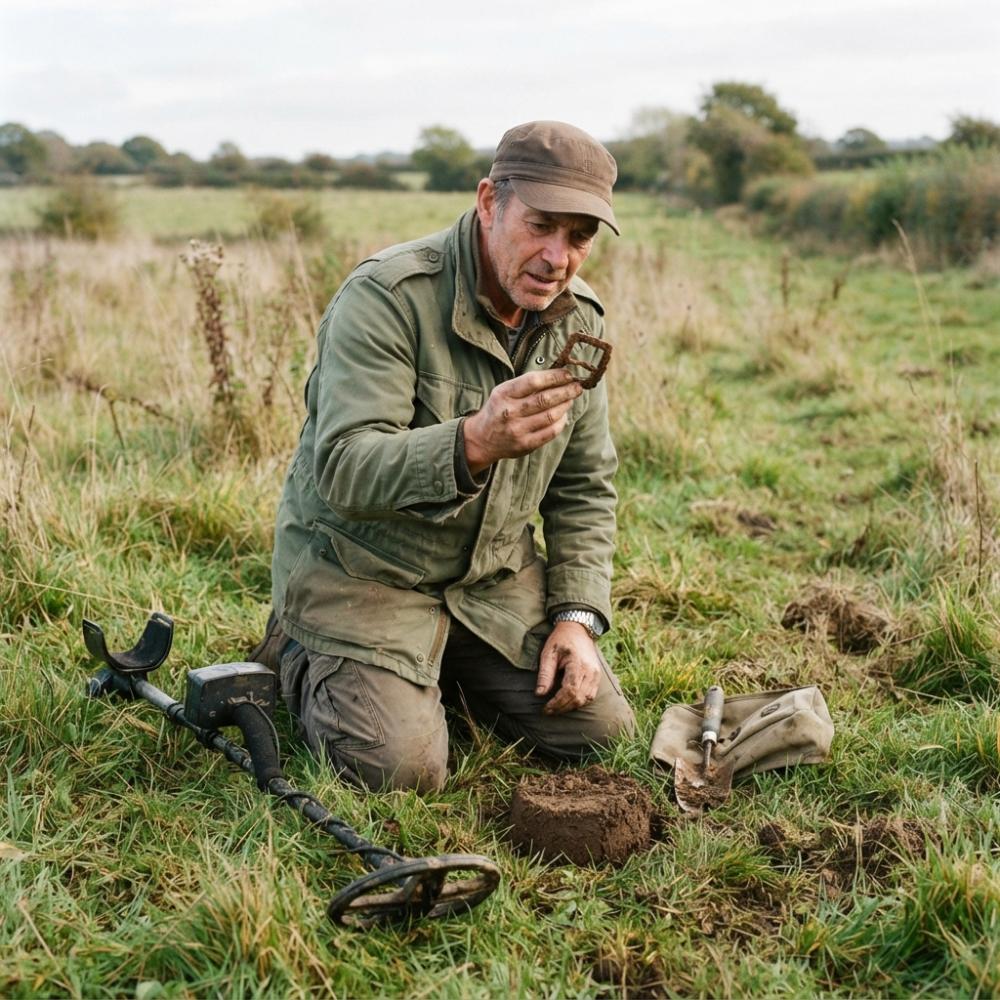
5 Factors That Control How Long It Takes to Find Relics Metal Detecting
The timeline for finding relics follows predictable patterns based on variables you can measure and control. Here is a structured framework based on hours hunted and site type, synthesized from community-reported experiences on forums like Friendly Metal Detecting Forums and TreasureNet.
Site History and Age
Your site is the single largest multiplier on your find-rate. A public park established in 1950 will yield modern coins and pull tabs, regardless of your equipment. Sites with pre-1900 activity, old homesteads, forgotten fairgrounds, abandoned mill sites, or Civil War encampments, are where relics actually live. The age of the site directly correlates with the density of non-ferrous targets like brass buttons, lead shot, and copper coins that have survived centuries of soil chemistry.
A practical benchmark: a "virgin" site (never hunted) with pre-1900 activity typically produces a keeper relic within 5 to 10 hours. A "hunted-out" site of the same age may take 30 to 50 hours, because easy surface targets are gone and you are chasing deep, masked signals.
Soil Composition and Mineralization
Highly mineralized soil, common in regions with red clay (e.g., the Piedmont) or black sand (e.g., volcanic areas), reduces your detection depth by up to 40% and causes false signals. Ground balance is the feature that filters out this natural interference. Most modern VLF detectors handle this automatically, but you need to understand the concept to trust what your machine is telling you. In soft, plowed fields, objects sink at a rate of roughly 1 inch per 10 to 20 years due to frost heave and biological activity. In packed clay, that rate drops to near zero, meaning a Civil War bullet buried in 1865 is likely still within 6 to 8 inches of the surface in clay, but could be 12 to 18 inches deep in a cultivated field. Adjust your search coil's depth expectations accordingly.
Your Equipment and Settings
An entry-level single-frequency detector will find relics, but it will take longer because you will dig more trash. Simultaneous multi-frequency (SMF) technology, found in machines like the Minelab Equinox series or the Nokta Legend, reads multiple ground signals at once and provides significantly better target identification in mineralized soil. Iron masking, where a good target sits adjacent to rusty iron and is hidden by the ferrous signal, is reduced on SMF units. A common pattern among relic hunters is that upgrading from a single-frequency to an SMF machine cuts their trash-digging rate by half and increases their depth by 2 to 3 inches on deep targets.
Your discrimination settings determine what you ignore. Set them too high (e.g., rejecting all iron) and you will miss non-ferrous relics that sit next to iron, such as a brass buckle adjacent to a horseshoe nail. A better approach is to run a low discrimination setting, dig the "mixed" signals, and rely on your pinpointer to isolate the target. This trade-off, digging more trash to catch more relics, is the core skill of relic hunting.
Site-Specific Success Metrics: Virgin vs. Hunted-Out Ground
This is the most predictive factor of your time-to-find. A "virgin" site has never been systematically detected. These are rare and require significant research, old farmsteads now timber lots, forgotten church picnic grounds, or cellar holes in state forests. On virgin ground, experienced detectorists report a keeper relic every 2 to 4 hours.
A "hunted-out" site, your local public park, a popular beach, or any spot detected for years, requires a different strategy. The easy surface targets are gone. Hunt deeper (using a larger coil or higher transmit power), hunt slower, and focus on "trashy" areas others avoided. Here, the find-rate drops to one keeper per 10 to 20 hours, often modern coins rather than relics. Knowing which site type you are on saves dozens of unproductive hours.
The Psychology of Patience: The Burnout Factor
Most beginners quit after 10 to 15 hours without a relic, not a reflection of skill but of unrealistic expectations. The hobby rewards persistence paired with good research and equipment. A common pattern: the first relic comes after a "dry spell" of 20 to 30 hours, followed by a burst once they learn audio cues and switch to a researched site.
To combat burnout, set a realistic first-season goal: 40 hours across 15 to 20 outings, focused on two or three researched sites. Track finds in a notebook or app, noting date, site, hours, and targets dug. This shows your personal find-rate trend, more motivating than a lucky day. Success comes from consistency, learning from trash digs, and refining site selection.
How to Research Sites for Metal Detecting
Research is the shortcut. Detectorists who spend two hours researching for every hour of field time consistently find more relics. Start with historical maps showing structures, roads, and gathering places that no longer exist, old fairgrounds, schoolyards, churches, and trading posts. Compare against modern aerial views to identify fields or vacant lots once active.
Local historical societies and county records often hold plat maps and tax ledgers pinpointing vanished homesites. Overlay an old map onto a current satellite image using free GIS tools. When you find a promising spot, check ownership and get permission before you go.
Choosing the Best Entry Level Metal Detector for Relics
You do not need a $1,500 flagship to start, but you do need adjustable discrimination and a reasonable frequency range. The best entry level metal detector for relics offers a target ID number, not just a tone, and can ground balance to your local soil. Many beginners start with a basic VLF unit and upgrade within a year, a fine path if you buy from a dealer offering real support before and after purchase.
At Treasure Coast Detectors, we stock top brands like Minelab, Nokta, and XP, and can match you to a detector based on your planned relic hunting. We also offer curated bundles including a pinpointer, the unsung hero of recovery. A good pinpointer, like the Minelab Pro-Find 35 at $99.00, cuts dig time in half by locating the target precisely in the plug.

| Detector Type | Best For | Key Setting | Typical Use |
|---|---|---|---|
| Entry VLF | Beginners, coin shooting | Discrimination | Parks, schools |
| Multi-Frequency | Relic hunting, mineralized soil | Ground Balance | Old fields, homesteads |
| Pulse Induction | Beach, extreme mineralization | Salt Mode | Wet sand, deep targets |
Trash vs. Treasure: Cutting Down Your Dig Time
The trash-to-treasure ratio frustrates most new hobbyists. Expect to dig 20 to 50 pull tabs and bottle caps for every good target in your first outings. That ratio improves as you learn your machine's signal response, but never reaches zero. The difference between frustration and productivity is learning the subtle audio cues that separate a nickel from a rusty nail.
A common mistake is digging every signal above a certain number. Instead, learn the "grunt" of iron and the "sweet" tone of a conductive target. Ferrous vs non-ferrous is the core distinction, shown on most detectors' conductivity scale. A pinpointer is the fastest way to recover a target without damage. XP's MI-4 Pinpointer at $139.00 is waterproof and standalone, a rugged choice for wet grass or shallow water.

Legal Requirements for Metal Detecting You Must Know
Before you dig, know the law. In the United States, rules vary by land type. Metal detecting is generally prohibited in National Parks and on National Battlefields. The Archaeological Resources Protection Act makes it a felony to remove artifacts from federal land without a permit. On state land, regulations differ, so check with the specific state park agency. Your safest bet is private property with explicit written permission.
Many municipalities also have ordinances against digging in city parks, even for hobby purposes. Always research the specific rules for the land you plan to hunt. Ignorance is not a defense, and a conviction for artifact theft can carry fines and jail time. For a comprehensive overview, consult the National Park Service guidance on metal detecting.
Speeding Up the Process: Tools and Techniques
The difference between finding relics in 10 versus 100 hours often comes down to recovery speed and swing technique, measurable efficiencies experienced detectorists use to maximize every hour.
Swing Technique and Grid Search
A slow, methodical swing, 1 to 2 seconds per sweep, coil parallel to the ground, overlapping each pass by 50%, ensures you do not miss targets. Most beginners swing too fast, reducing depth penetration. Slowing your swing by half will immediately reveal targets at depths previously missed.
Hunting in a grid pattern, rather than wandering, guarantees full coverage. Mark your start, walk straight lines spaced at your coil's width, then turn 90 degrees to cross-hatch. This double-coverage method catches targets masked by a different angle on the first pass. For large fields, use a GPS app like OnX Hunt or measuring tape and flags.
Coil Selection: Size Matters
Your stock coil, typically 11 inches round, compromises between depth and sensitivity. On open fields, a larger coil (12x15 or 15 inches round) increases depth by 2 to 3 inches and covers more ground per sweep, critical for deep relics on hunted-out sites. However, larger coils are heavier and less sensitive to small targets like lead shot. For trashy or tight areas, a smaller coil (6 inches round or 5x8 elliptical) gives better target separation between iron nails. Many serious hunters carry two coils and switch based on conditions.
Recovery Speed and Pinpointer Efficiency
Recovery speed controls how quickly your detector resets after a target. A faster speed (higher number) is better in trashy areas for separating adjacent targets. A slower speed (lower number) is better for deep, clean targets, providing a stronger signal. Most modern detectors adjust this in real time. A common mistake is leaving it at factory default, a compromise that excels in neither condition.
Your recovery technique also matters. Learn to cut a clean three-sided plug, pop it out, and use your pinpointer to locate the target without breaking it. This preserves the site and speeds up your dig time. A good pinpointer cuts recovery from 2 minutes per target to under 30 seconds. The XP MI-6 Pinpointer at $179.00 pairs wirelessly with XP detectors, letting you switch without changing audio modes. For non-XP users, the Minelab Pro-Find 35 at $99.00 is a reliable option.

Target Recovery: The 3-Plug Method
For deep targets (8 inches or deeper), use the three-plug method: cut a circle around the target, remove the top plug, then dig a second plug from the center, and finally a third if needed. This minimizes the hole size and preserves the site's integrity. After recovering the target, replace the plugs in reverse order and tamp them down. This leaves no trace of your dig and ensures you are welcome back to the site.
Tracking Your Progress: The Find-Rate Log
To measure whether you are speeding up, keep a log of each outing: date, site, hours hunted, targets dug, and keepers. After 20 hours, calculate your personal find-rate (keepers per hour). Most beginners start at 0.1 keepers per hour (one every 10 hours). After refining technique and site selection, that typically improves to 0.5 to 1.0 keepers per hour on a good site. This data-driven approach turns a vague hobby into a measurable skill, you will know your own average, not just a guess.
Conclusion: Field Time Is Everything
The psychology of patience is the final hurdle. Most beginners quit right before their first relic, usually after a few trash-filled outings. The hobby rewards persistence paired with good research and equipment. You cannot control when a relic surfaces, but you can control the probability by stacking the odds in your favor.
Start with a solid entry-level machine, learn its language, and spend more time researching than you think you need. When you are ready to upgrade or need guidance on your first detector, the team at Treasure Coast Detectors offers expert advice on top brands like Minelab, Nokta, and XP. As a top tier Google store, we are here to help you find the right gear for your adventures.
Frequently Asked Questions
Can I keep what I find metal detecting?
On private property with the landowner's written permission, you can generally keep what you find. Public land rules vary widely. Federal and state parks often prohibit removal of artifacts. You need an ARPA permit for federal lands managed by agencies like the BLM. Always check local regulations before digging to avoid legal trouble.
What is the best metal detector for finding relics?
A detector with adjustable discrimination and ground balance is essential. For the detector itself, look for models from Minelab, Nokta, or XP with simultaneous multi-frequency (SMF) technology. SMF handles mineralized soil better, which often hides deep relics.
How deep are historical relics usually buried?
Depth varies significantly. A coin dropped in a farm field 50 years ago might sit at 4 to 6 inches. Older relics from the 1800s can be 8 to 12 inches deep or more. Objects sink through sedimentation and frost heave over time. A detector with good depth capability and a larger search coil improves your odds of reaching those deeper targets.
What are the best locations for finding relics?
Old homesteads, cellar holes, abandoned schoolyards, and former fairgrounds are prime spots. Research historical maps to find sites that no longer exist. Look for areas where people gathered, like old picnic groves or crossroads. Always secure permission from the current landowner before you start hunting.
Getting started is the hardest part. Choosing the wrong detector or hunting the wrong site can stall your progress for months. Treasure Coast Detectors pairs you with the right equipment for your specific relic hunting goals and backs you up with support before and after your purchase. Get started with Treasure Coast Detectors and shorten the path to your first historical find.
Leave a comment