

How to Clean Found Artifacts: A Step-by-Step Guide
Table of Contents
- What You'll Need Before You Start
- Initial Assessment and Safety Precautions
- How to Clean Found Artifacts: Initial Cleaning Techniques
- Cleaning Glass and Ceramic Artifacts
- Cleaning Bone and Organic Materials
- Legal Requirements for Found Artifacts
- When to Consult a Professional Conservator
- Drying, Storage, and Post-Cleaning Documentation
- Frequently Asked Questions
Last Updated: September 2, 2026
What You'll Need Before You Start
Cleaning found artifacts properly requires the right tools and materials. Most people damage artifacts by using household cleaners, abrasive scrubbers, or tools designed for other purposes.
Start with soft-bristled brushes. A standard soft toothbrush works well for removing loose soil and surface debris without scratching delicate surfaces. Avoid stiff-bristled or wire brushes, which create micro-abrasions that compromise artifact integrity.
Water is your primary cleaning agent. Deionized water is ideal because it lacks minerals that can leave residue or cause chemical reactions on certain materials. Distilled water is a reasonable substitute; tap water can work in a pinch but may leave deposits on porous materials.
You'll also need cotton cloths or soft lint-free rags. Avoid paper towels, they're abrasive and shed fibers. A spray bottle lets you apply water gently rather than dunking artifacts, which is important for waterlogged finds or pieces with loose components.
For beach finds and sandy artifacts, a sand scoop is essential. High-quality sand scoops like the T-Rex design with honeycomb construction make sifting through sediment efficient while protecting the artifact from unnecessary handling.

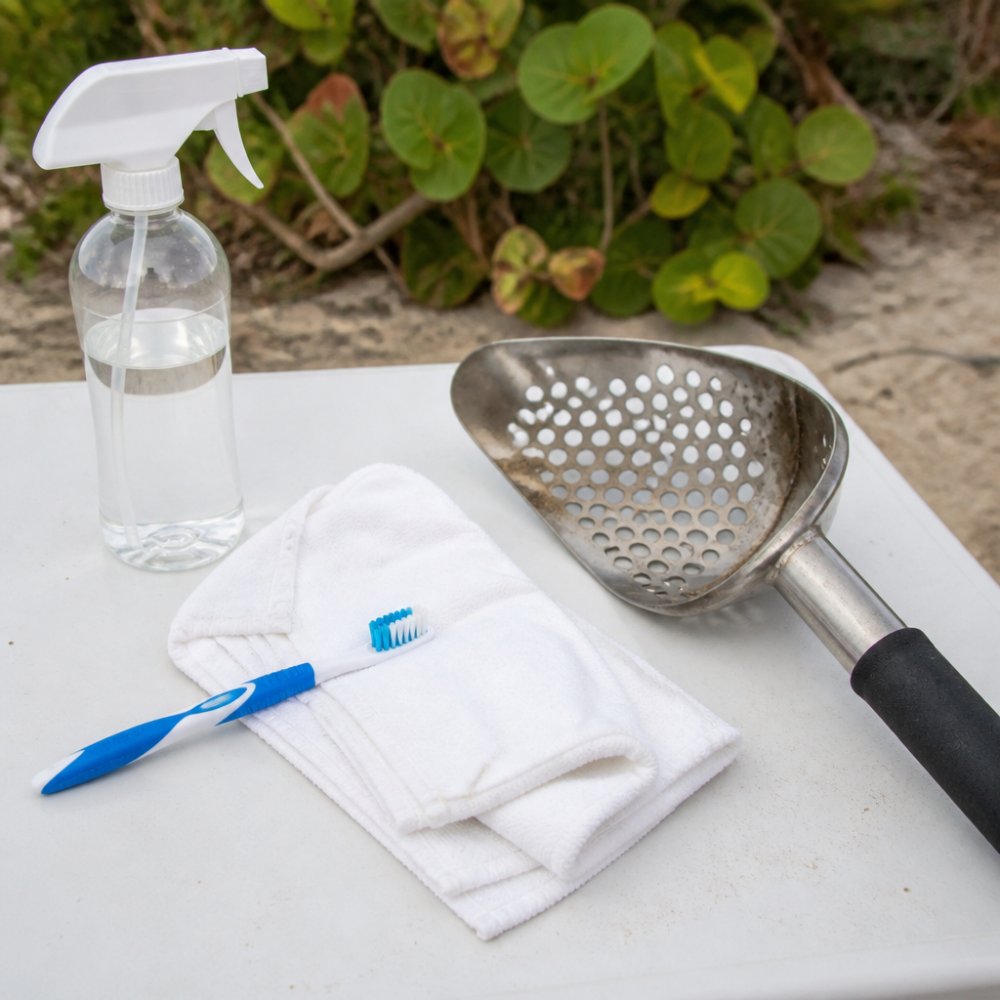
Keep a magnifying glass or jeweler's loupe handy to inspect your artifact before and after cleaning. A small notebook for recording observations is equally important, documentation is part of professional curation.
Initial Assessment and Safety Precautions
Never clean an artifact without first understanding what you're holding. A quick assessment prevents damage and identifies materials that require special handling.
Examine the artifact under good lighting. Look for signs of fragility: cracks, loose sections, flaking paint or coating, or areas where the surface seems different from the rest. If an artifact shows active deterioration, pieces coming off, visible corrosion spreading, or areas that crumble when touched lightly, stop. These pieces need a professional conservator.
Identify the material. Is it metal, ceramic, glass, bone, stone, or a combination? Different materials respond differently to water, air exposure, and cleaning agents. A ceramic piece might tolerate gentle water rinsing, while bone can swell and warp if oversaturated.
Test a small, inconspicuous area first. Apply a tiny amount of water to the back or underside of the artifact. Watch for discoloration, softening, or any adverse reaction. Wait 30 seconds, then dry that spot completely. If nothing negative happens, you can proceed with confidence.
Work in a controlled environment with good lighting, not outdoors where wind or temperature fluctuations can cause stress. Keep the workspace clean so you don't accidentally introduce new contaminants. A white cloth beneath your work area helps you spot small pieces that might fall.
Always wear nitrile gloves when handling artifacts. Your skin's natural oils and salts can damage delicate surfaces and accelerate corrosion on metals.
How to Clean Found Artifacts: Initial Cleaning Techniques
The goal of initial cleaning is removing loose soil and surface debris without disturbing the artifact itself.
Dry Brushing for Surface Debris
Dry brushing is your first step for any artifact. Use a soft-bristled brush with gentle, deliberate strokes in one direction. Never scrub back and forth aggressively. For coins and metal objects, brush from the center outward to avoid pushing debris into recesses.
Work over a white cloth or tray so you can see what's coming off. Loose soil typically releases easily with this method. If debris doesn't come away with light brushing, don't force it, that's a sign the soil has mineralized or bonded to the surface, which requires water.
For fragile pieces like pottery shards or bone, use an even lighter touch. The goal is removing surface dust, not cleaning the piece thoroughly. Patience here prevents damage that water later won't fix.
Gentle Water Rinsing Methods
Once loose debris is removed, water rinsing can address more stubborn soil. Use deionized or distilled water in a spray bottle. Start with a very fine mist from about 12 inches away. Never pour water directly on the artifact or submerge it unless you're certain the material can tolerate full saturation.
Spray lightly while gently brushing with your soft toothbrush. Rinse repeatedly with fresh water until the water running off is clear. For bone, stone, and organic materials, use minimal water and dry immediately after rinsing.
Never soak artifacts unless you're absolutely certain they can handle it. Waterlogged pieces are an exception and may need careful rehydration management best left to conservators.
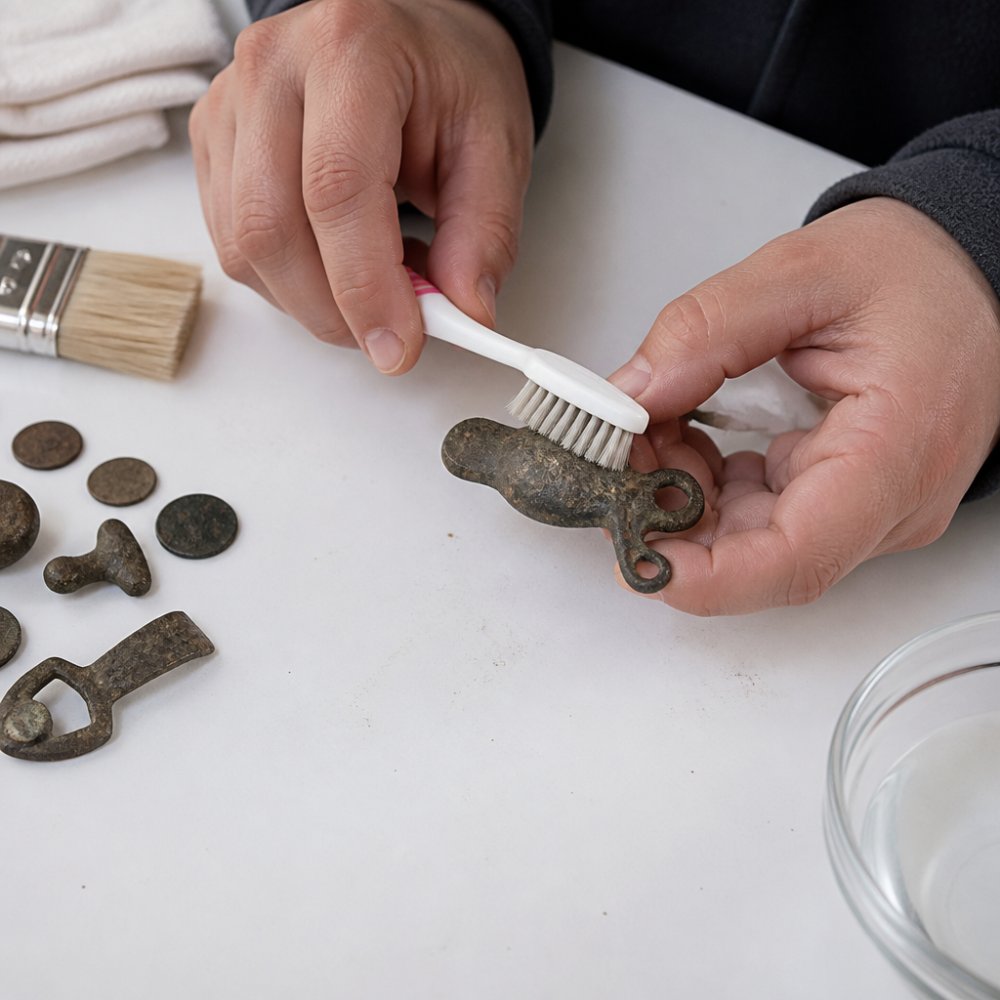
After rinsing, pat the artifact dry immediately with a soft cloth. Don't let it air-dry, as minerals in any remaining water can leave deposits. For metal objects especially, quick drying prevents new corrosion from forming.
Cleaning Glass and Ceramic Artifacts
Glass and ceramic artifacts are generally more water-tolerant than other materials, but they still require care. Both materials are brittle and can chip or crack if mishandled.
For glass, gentle water rinsing is usually safe. Avoid thermal shock, don't rinse hot glass with cold water or vice versa. Room-temperature water is safest.
Ceramic presents more complexity. Unglazed pottery is porous and can absorb water, potentially weakening the clay structure if saturated. Glazed ceramics are more water-resistant. For unglazed pottery, use minimal water and dry immediately. For glazed ceramics, you can be more generous with rinsing.
Never use abrasive pads or harsh brushes on either material. Stick with soft toothbrushes and your softest cloths. Chips and cracks in glass or ceramic don't need cleaning inside them. Soil trapped in cracks is often safer left alone than disturbed.
Cleaning Bone and Organic Materials
Bone, antler, ivory, and other organic materials demand the most cautious approach. These materials are porous, can absorb water, and may be fragile due to age or burial conditions.
Use minimal water on bone. A light spray and gentle brush work, but dry immediately, within 30 seconds of rinsing. Never soak bone or leave it wet. Organic materials can swell, warp, and develop mold if oversaturated.
Bone can also be sensitive to temperature and humidity changes. Clean bone artifacts in a stable environment and store them in a consistent climate. Avoid direct sunlight or heat sources during drying.
Worked bone with carved details or decorative elements requires extra care. Brush only in the direction of the carving, never against it. Avoid getting water into deep carved areas where it's hard to dry completely.
Legal Requirements for Found Artifacts
Before you clean anything, understand the legal landscape. Artifact ownership and the legality of collecting varies significantly by location and type of find.
On public land, national forests, public beaches, and state parks, artifact collection is often prohibited or heavily restricted. The Archaeological Resources Protection Act (ARPA) makes it illegal to excavate or remove artifacts from federal land without a permit. Violations carry substantial fines and potential criminal charges.
Private land rules are different. If you have the landowner's explicit permission, collecting on private property is generally legal. However, some states require permits even on private land for certain artifact types. Always verify local regulations before collecting.
Certain artifact types, Native American items, historical documents, and anything over a specific age, may be protected regardless of where you find them. The Native American Graves Protection and Repatriation Act (NAGPRA) requires respectful treatment and potential repatriation of Native American cultural items.
Documentation matters legally. Photograph artifacts in their found state, record the location, note the date, and keep all documentation. If you ever need to prove where something came from or that you found it legally, this record is your evidence.
When to Consult a Professional Conservator
Some artifacts need professional care. Knowing when to stop and call in an expert prevents costly mistakes.
Consult a conservator for any artifact showing active deterioration, visible corrosion spreading, flaking, crumbling, or pieces coming apart. Waterlogged artifacts, items found in wet soil, swamps, or submerged, almost always need professional care. Water-saturated organic materials and certain metals require specialized drying and stabilization techniques.
Valuable or historically significant pieces deserve professional assessment. If you suspect an artifact is rare, old, or historically important, a conservator's evaluation is worth the investment.
Artifacts with unknown composition or materials should be evaluated by a professional before cleaning. Pieces with loose components, fragile decorative elements, or complex structures benefit from professional care.
Finding a conservator: Contact your state's archaeological office, local museums, or university archaeology departments for referrals. The American Institute for Conservation maintains a directory of professional conservators.
Drying, Storage, and Post-Cleaning Documentation
How you dry and store artifacts after cleaning determines their long-term condition.
Dry artifacts completely before storage. Use soft cloths to pat them dry, then allow air circulation in a stable environment. Don't place wet artifacts in sealed containers where moisture can't evaporate. Avoid direct sunlight and heat sources during drying.
Storage conditions matter as much as cleaning. Keep artifacts in a stable environment with consistent temperature and humidity. Fluctuating conditions cause expansion and contraction that damages materials over time.
Store artifacts in acid-free containers or wrapping. Acid in regular paper, cardboard, or cloth can damage artifacts over decades. Small artifacts can be wrapped individually in acid-free tissue and placed in labeled boxes.
Documentation is essential. Record:
- A detailed description of the artifact
- The location where it was found
- The date it was found
- Photographs before cleaning, during cleaning, and after cleaning
- Any damage or unusual features
- The cleaning method used
- Storage location and conditions
This documentation becomes the artifact's provenance. Good provenance dramatically increases an artifact's value and significance if you ever donate it to a museum. Label storage containers clearly with artifact descriptions and identifying numbers.
Consider cataloging your collection. Simple spreadsheets tracking what you've found, where, and when create a valuable record. Over time, patterns emerge that improve your collecting efficiency and contribute to your understanding of local history.
Cleaning found artifacts properly balances curiosity with respect for history. The techniques covered here preserve artifacts while making them visible and accessible for study. At Treasure Coast Detectors, we understand that successful treasure hunting extends beyond finding, it includes caring for what you discover. Our team helps hobbyists and serious collectors maintain their finds properly and choose equipment that supports responsible artifact recovery. Whether you're just starting out with a basic metal detector or upgrading to a specialized model for challenging terrain, we're here to support your collecting journey with expert guidance and professional-grade equipment from trusted brands like Minelab and Nokta. Get started with Treasure Coast Detectors and discover how the right detector and proper care techniques transform your finds into a meaningful collection.
Frequently Asked Questions
What tools are best for cleaning metal detector finds?
Start with soft-bristled toothbrushes, cotton cloths, and deionized water in a spray bottle for non-invasive cleaning. For sandy finds, sand scoops like the T-Rex Sand Scoops or CKG Stainless Steel models help separate soil without damaging artifacts. Avoid wire brushes and aggressive scrubbing tools, which can scratch surfaces and remove patina that holds historical value. Always work in a controlled environment with proper lighting to monitor your progress.
Is it legal to clean artifacts found on public land?
Laws vary significantly by location and artifact type. On federal lands managed by the Bureau of Land Management (BLM) or National Park Service, removing or altering artifacts without permits violates the Archaeological Resources Protection Act (ARPA). State and local laws differ, and private property rules depend on landowner permission. Before cleaning any significant find, research your local regulations or contact your state's archaeological office. When in doubt, consult a professional conservator who understands these legal requirements for found artifacts.
When should I consult a professional conservator?
Contact a professional conservator if you find waterlogged artifacts, items made of fragile materials like bone or ceramic, coins with visible corrosion, or anything with historical significance. Conservators use specialized techniques to prevent degradation and preserve artifact integrity. They can also perform residue analysis and proper curation to maintain provenance. Your local museum or state archaeological office can recommend qualified conservators in your area. Professional guidance is especially important before cleaning rare or potentially valuable finds.
Can I clean waterlogged artifacts at home?
Waterlogged artifacts require specialized care because rapid drying causes structural damage and material degradation. These items need gradual stabilization in controlled humidity environments that home settings cannot provide. A professional conservator has the equipment and expertise to properly treat waterlogged finds through slow drying and chemical stabilization. Attempting home cleaning on waterlogged materials often results in permanent damage. If you find items that have been submerged for extended periods, preserve them in damp conditions and seek professional help immediately.
Leave a comment