

How to Avoid Digging Junk: A Metal Detecting Guide
Table of Contents
- Understanding Target Signals and Iron Rejection
- Metal Detector Discrimination Settings Explained
- How to Interpret Metal Detector Signals in the Field
- Best Metal Detector for Trashy Areas
- Mastering Pinpointing and Recovery Tools
- The 'Dig Everything' Debate: When to Skip a Target
- Site Logistics, Safety, and Digging Etiquette
- Avoid Digging Junk: Your Action Plan
- Frequently Asked Questions
Last Updated: August 31, 2026
Understanding Target Signals and Iron Rejection
The difference between a productive hunt and endless trash comes down to recognizing what your detector is telling you. Most beginners treat every beep the same and dig everything, pulling bottle caps and foil until they quit or blame the machine.
Your metal detector sends an electromagnetic field that bounces off metal and creates a response. Iron-rich trash like nails and pull tabs create distinct signatures compared to coins and jewelry. Iron rejection, or discrimination, is the detector's ability to ignore those iron signatures while responding to targets you want.
Iron rejection settings vary wildly between detector models. What works on a Minelab requires different tuning on an XP or Nokta machine. The principle is the same; the execution differs completely.
Metal Detector Discrimination Settings Explained
Discrimination tells your detector to ignore certain metals based on conductivity and magnetic properties. More aggressive discrimination ignores more trash but might miss shallow targets or smaller coins. The key is finding the sweet spot for your hunting environment.
Treasure Coast Detectors carries detectors from Minelab, Nokta, XP, and OKM. Each brand implements discrimination differently, but the underlying principle remains consistent.
Notch Filtering vs. All-Metal Mode
All-metal mode responds to every conductive target without filtering. You hear signals for coins, trash, foil, nails, everything. The advantage is depth and sensitivity to small targets; the disadvantage is obvious: you dig far more trash. All-metal mode works best in clean areas or when hunting small gold nuggets where depth matters more than discrimination.
Notch filtering lets you selectively reject specific metal conductivity ranges. Most detectors allow you to notch out iron, aluminum foil, and pull tabs while responding to coins and jewelry. The catch is that pull tabs and zinc pennies occupy similar conductivity ranges. Notch too aggressively to reject pull tabs and you might miss pennies.
VDI Numbers and Target Separation
VDI stands for Voltage Discrimination Index. It's a numerical readout indicating what type of metal the detector thinks it's detecting. VDI numbers typically range from 0 to 99, with different ranges representing different metals:
- Iron and ferrous metals: typically VDI 0-20
- Aluminum foil and pull tabs: typically VDI 12-30
- Nickels: typically VDI 25-35
- Zinc pennies: typically VDI 35-50
- Copper pennies and most jewelry: typically VDI 50-80
- Silver coins and high-conductivity targets: typically VDI 75-99
The numbers aren't absolute. A shallow pull tab might read as a nickel; a deep coin might read as aluminum. But the ranges provide a framework for decision-making. In trashy areas, many hunters set detectors to respond only to VDI 40 and above, effectively ignoring most aluminum trash and nails.
Metal detector VDI scale reference guide provides manufacturer-specific information.
How to Interpret Metal Detector Signals in the Field
Reading signals in real time is where theory meets practice. Your detector sends information through audio response, visual display, and sometimes vibration feedback. Learning to interpret that information before digging is the difference between efficiency and endless holes.
Audio Response Patterns and Repeatable Signals
A consistent, clear tone that repeats when you pass over the same spot indicates a solid target. A scratchy, inconsistent tone that changes as you move suggests a false signal, trash, or a target at the edge of your coil's detection zone.
Repeatable signals are your best friend. When you sweep over a target and get the same response multiple times from different angles, that's a keeper signal. If the signal disappears from one direction but reappears from another, you're likely dealing with foil or a shallow pull tab.
Listen for tone quality. A high, clear, crisp tone usually indicates a good conductor like copper, silver, or gold. A lower, duller tone might suggest iron or aluminum. Coil overlap matters, each sweep should overlap the previous one by about 50% to ensure you don't miss targets and get multiple opportunities to confirm repeatable signals.
Visual Identification: Pull Tabs, Foil, and Nails vs. Treasure
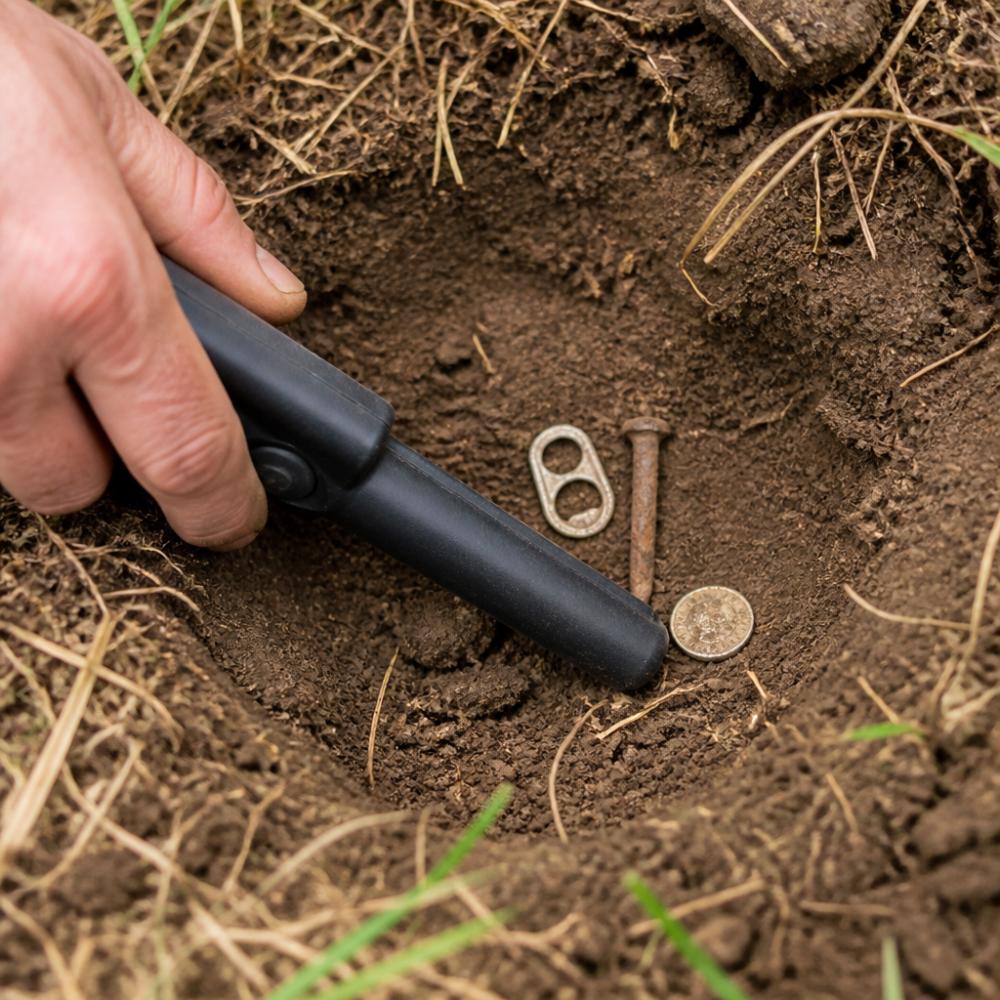
Once you dig the hole, visual identification becomes crucial. Pull tabs are small aluminum rings from beverage cans, flat and roughly dime-sized. Foil is thin and crinkled. Nails are ferrous, often rusty, and elongated.
Coins have weight and heft. Even heavily corroded pennies feel substantial. Jewelry has distinctive structure, rings have form, earrings have posts or hooks. Spend your first few hunts in trashy areas digging everything to get comfortable with what trash looks and feels like.
Best Metal Detector for Trashy Areas
Trashy areas demand specific capabilities: handling high iron mineralization, separating trash from treasure reliably, and maintaining depth in noisy ground. The best detectors have multiple discrimination modes, adjustable sensitivity, and good ground balancing. They also tend to have smaller coils, which provide better target separation in cluttered soil.
Coil Selection and Sweep Speed Technique
Coil size directly impacts success in trashy areas. Larger coils detect deeper but struggle with target separation when ground is full of iron trash. Smaller coils sacrifice some depth but give precise control.
In trashy areas, a 5-inch to 6.5-inch coil is ideal. Some detectors have interchangeable coils, letting you switch to a smaller coil for trashy areas and a larger coil for clean ground.
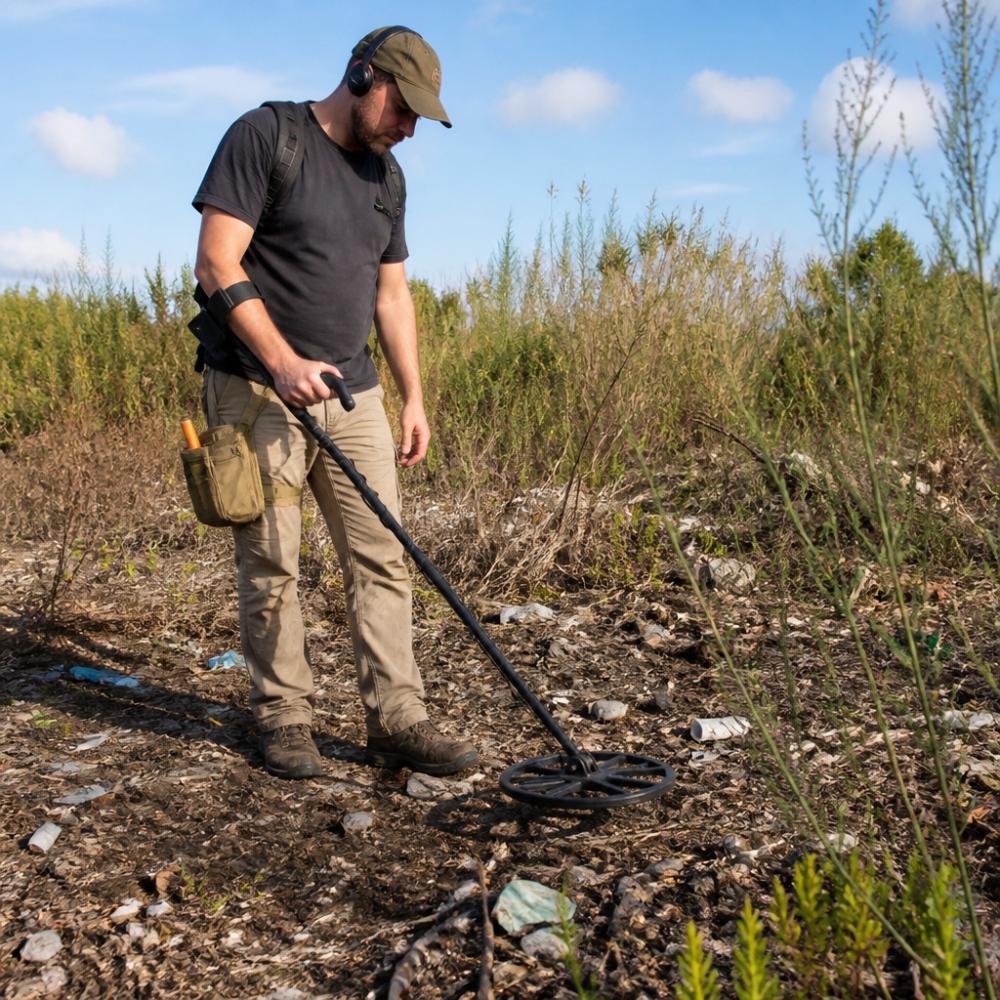
Sweep speed matters as much as coil size. A slow, deliberate sweep of 4 to 6 inches per second gives your detector time to process the ground and respond to targets. Fast sweeping causes you to miss shallow targets and creates false signals. In trashy areas, slow is always better. Overlap each pass by 50% to ensure you don't miss targets and give multiple opportunities to confirm repeatable signals.
Ground Balance and Sensitivity Adjustments
Ground balance is your detector's ability to ignore soil mineral content and respond only to metal targets. Mineralized soil with high iron content creates electrical noise that can overwhelm your detector's ability to hear actual targets.
Most modern detectors offer automatic ground balancing, which continuously adjusts to changing soil conditions. Some allow manual ground balancing, where you calibrate the detector to your specific soil before hunting. Manual ground balancing often provides better performance in highly mineralized areas but requires more setup time.
Sensitivity controls how aggressively your detector responds to targets. In trashy areas, run sensitivity lower than in clean areas. This reduces electrical noise from iron trash and makes it easier to hear legitimate targets. Start with moderate settings and adjust based on what you're hearing.
Mastering Pinpointing and Recovery Tools
Once you've confirmed a target is worth digging, pinpointing narrows down exactly where to dig. A pinpointer is a handheld metal detector designed to work with your main detector. It helps locate the exact position of the target within the hole you've dug, saving time and reducing damage.
The Minelab Pinpointer Pro Find 35 uses DIF technology, which eliminates interference from your operating metal detector. The Pro Find 35 costs $99 and is reliable for most hobbyists. For XP detector users, the XP MI-4 Pinpointer ($139) works independently or paired with XP systems. The Minelab Pro-Find 40 ($149) offers 10% greater detection depth than the Pro Find 35, which matters when hunting in wet sand or heavily mineralized soil.

Pinpointers aren't optional if you're serious about efficiency. They cut digging time in half and reduce the risk of damaging targets with your shovel. Recovery tools, shovel, digging knife, and sifter, are equally important. A quality digging knife has a narrow blade for precise soil cutting. A sifter with small mesh separates targets from dirt without losing small items.
The 'Dig Everything' Debate: When to Skip a Target
Every hunter faces a tension: should you dig every signal or learn to pass on questionable targets?
The "dig everything" approach has merit for beginners. When new to the hobby, you lack experience to judge signals accurately. Digging everything teaches you what different targets sound like and what they look like when extracted. But "dig everything" wastes enormous amounts of time. A hunter who digs every signal might pull 50 pieces of trash to find one keeper. A hunter who's learned to read signals might dig 5 pieces of trash to find the same keeper.
The shift from "dig everything" to "selective digging" happens when you have enough experience to recognize patterns. A scratchy, inconsistent signal that changes as you move the coil? Probably foil. A signal that repeats clearly from multiple angles? Probably a keeper.
Site Logistics, Safety, and Digging Etiquette
Where you hunt matters as much as how you hunt. Private property requires permission. Public land has regulations. Beaches have seasonal closures. Know the rules before you turn on your detector.
For private property, always ask the landowner for permission. Be specific about where you want to hunt and what you're looking for. Most landowners appreciate the respect and will grant permission, especially if you fill your holes properly and leave the property better than you found it.
Public land varies by location. National Forests typically allow metal detecting in certain areas but prohibit it in others. BLM land generally allows it. State parks often prohibit it entirely. Check before you go.
Safety comes down to basics. Always call 811 before digging on any property. This free service marks buried utilities, gas lines, electrical cables, and water pipes so you don't hit them. Digging etiquette is simple: fill your holes completely. Use a shovel to cut a plug of sod, remove the soil beneath, extract the target, and replace everything. A proper plug can regrow in weeks. Respect other hunters' space, the metal detecting community is small, and reputation matters.
Avoid Digging Junk: Your Action Plan
The path from digging endless trash to finding consistent keepers follows a predictable progression. Start with understanding what your detector is telling you. Learn discrimination, VDI numbers, and audio response. Then practice in controlled environments to build pattern recognition.
| Step | Action | Timeline | Expected Outcome |
|---|---|---|---|
| 1 | Read your detector manual and understand all-metal vs. discrimination modes | 1-2 hours | Familiarity with your specific machine |
| 2 | Test discrimination settings in your yard with buried trash and coins | 2-3 hours | Understanding of how your detector responds to different targets |
| 3 | Hunt a trashy area with the goal of digging everything and learning what trash looks like | 3-5 hunts | Visual and tactile recognition of common trash types |
| 4 | Hunt a clean area and focus on audio response and repeatability | 3-5 hunts | Confidence in reading signals and passing on obvious trash |
| 5 | Adjust discrimination and sensitivity based on what you've learned | Ongoing | Customized settings for your specific hunting environment |
| 6 | Invest in a quality pinpointer if you haven't already | 1 time | Faster recovery and less damage to targets |
Get a pinpointer. Treasure Coast Detectors carries the Minelab Pinpointer Pro Find 35 ($99), the XP MI-4 ($139), and the Minelab Pro-Find 40 ($149). Pick one that matches your detector brand and budget. The time savings justify the cost within your first 10 hunts.

Hunt regularly. Consistency builds pattern recognition faster than sporadic hunts. Join a local detecting club if one exists. Other hunters in your area have already solved the problems you're facing. They know which sites are productive, which are trashy, and which are off-limits.
Most importantly, understand that avoiding junk is a skill, not a feature. No detector, no matter how expensive, will automatically separate trash from treasure. What an expensive detector does is give you better tools, clearer audio, more precise VDI numbers, better ground balancing, to make that separation yourself. The skill is yours to develop.
Frequently Asked Questions
What's the best discrimination setting for coin hunting?
Start with a notch filter that rejects iron and foil but keeps the target range where coins typically register. Most modern detectors display VDI numbers; coins typically fall between 12-40 on the scale, while pull tabs and aluminum foil cluster lower. Adjust your discrimination to exclude everything below your coin's expected range, then test on known targets in your hunting area. Ground mineralization affects this, so fine-tune on-site rather than relying on factory presets.
How do I tell the difference between a pull tab and a gold ring?
Pull tabs and aluminum foil produce repeatable signals with consistent audio response, while gold rings often give variable tones as you sweep over them. Use a pinpointer like the Minelab Pinpointer Pro Find 35 ($99) to isolate the exact target location once your detector signals a hit. Ring-shaped targets pinpoint to a tight spot; pull tabs scatter across a wider area because of their flat shape. Visual inspection after a shallow dig is the final check: rings have distinct edges and weight, while tabs are thin and crinkle.
Why does my metal detector beep everywhere in trashy areas?
Trashy ground contains high concentrations of ferrous (iron) debris like nails, bottle caps, and old hardware. Your detector's sensitivity may be set too high, causing target masking where multiple signals overlap and confuse the coil. Lower your sensitivity setting by 10-20% and use a smaller coil if available, which improves target separation in dense trash. Increase your sweep speed slightly and overlap each pass by 50% to ensure you're not missing real targets while cutting false signals. If the ground is heavily mineralized, enable ground balance adjustment to reduce noise.
Should I dig every signal or use discrimination to skip targets?
The choice depends on your goal and site conditions. In lightly hunted areas with few targets, digging everything ensures you don't miss keepers. In trashy areas, discrimination saves time and fatigue by filtering out iron and aluminum automatically. However, discrimination isn't perfect; some detectors falsely reject good targets or accept junk. Most experienced hunters use discrimination to reduce obvious trash, then manually skip signals that sound flat or unstable. The key is learning your detector's audio signature through field practice, not relying entirely on automatic rejection.
Avoiding digging junk comes down to reading your detector accurately and making informed decisions about which targets deserve your time. The detectors from Minelab, Nokta, XP, and OKM that Treasure Coast Detectors stocks all have the discrimination capabilities you need. What separates productive hunters from frustrated ones is training yourself to use those capabilities effectively. Start with the fundamentals, practice in varied environments, and trust the process. The keepers will follow.
Leave a comment